Create smart home rules correctly in e.g. the LUPUS XT2 PLUS.
# LUPUS XT1 PLUS, LUPUS XT2 PLUS, LLUPUS XT4, AUTOMATION, SMARTHOME
Reading time: approx. 10 minutes (for all variants)
To set up home automation correctly, several steps are necessary, depending on the complexity:
- Open the menu “Sensors” → “List” → “Sensor list” and click on “change” (gear wheel) for the sensor that should trigger an automation.
If you want to create an automation that is not triggered by a sensor, you can of course skip this step.
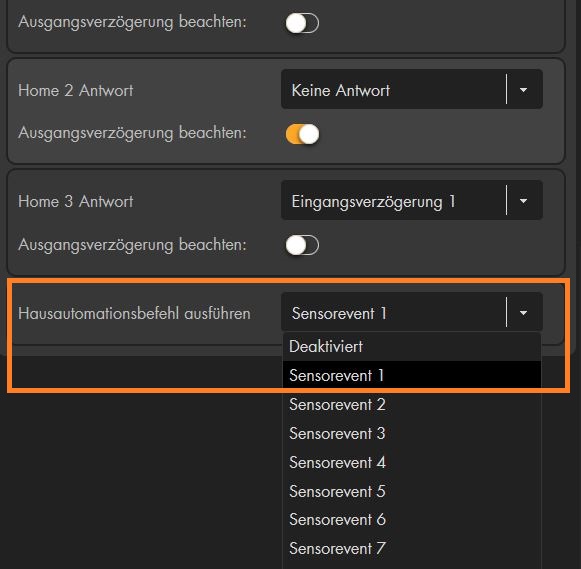
Now enter a “sensor event” for this sensor under “Execute home automation command”.
- Open the menu “Sensors” → “List” → “Sensor list” and click on “change” (gear wheel) for the sensor that should trigger an automation.
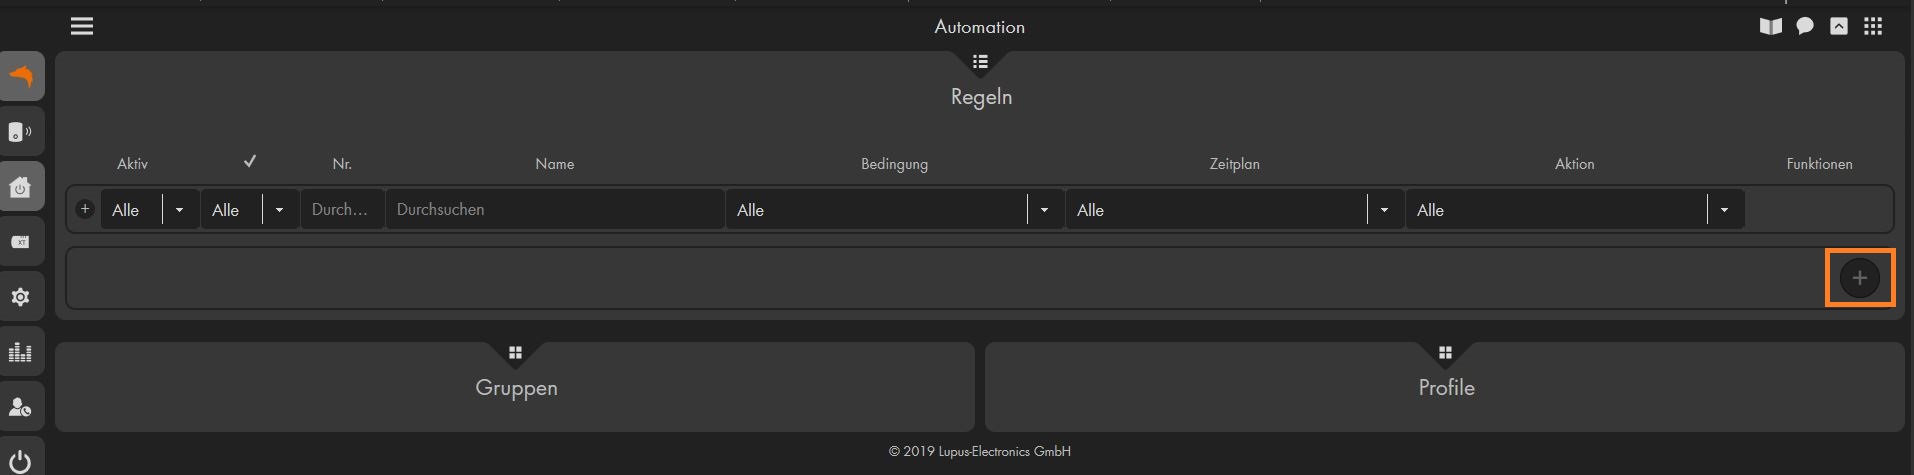
- Now go to the menu “Smarthome” → “Automation” → “Rules” and create a new automation using “Add” (plus symbol).
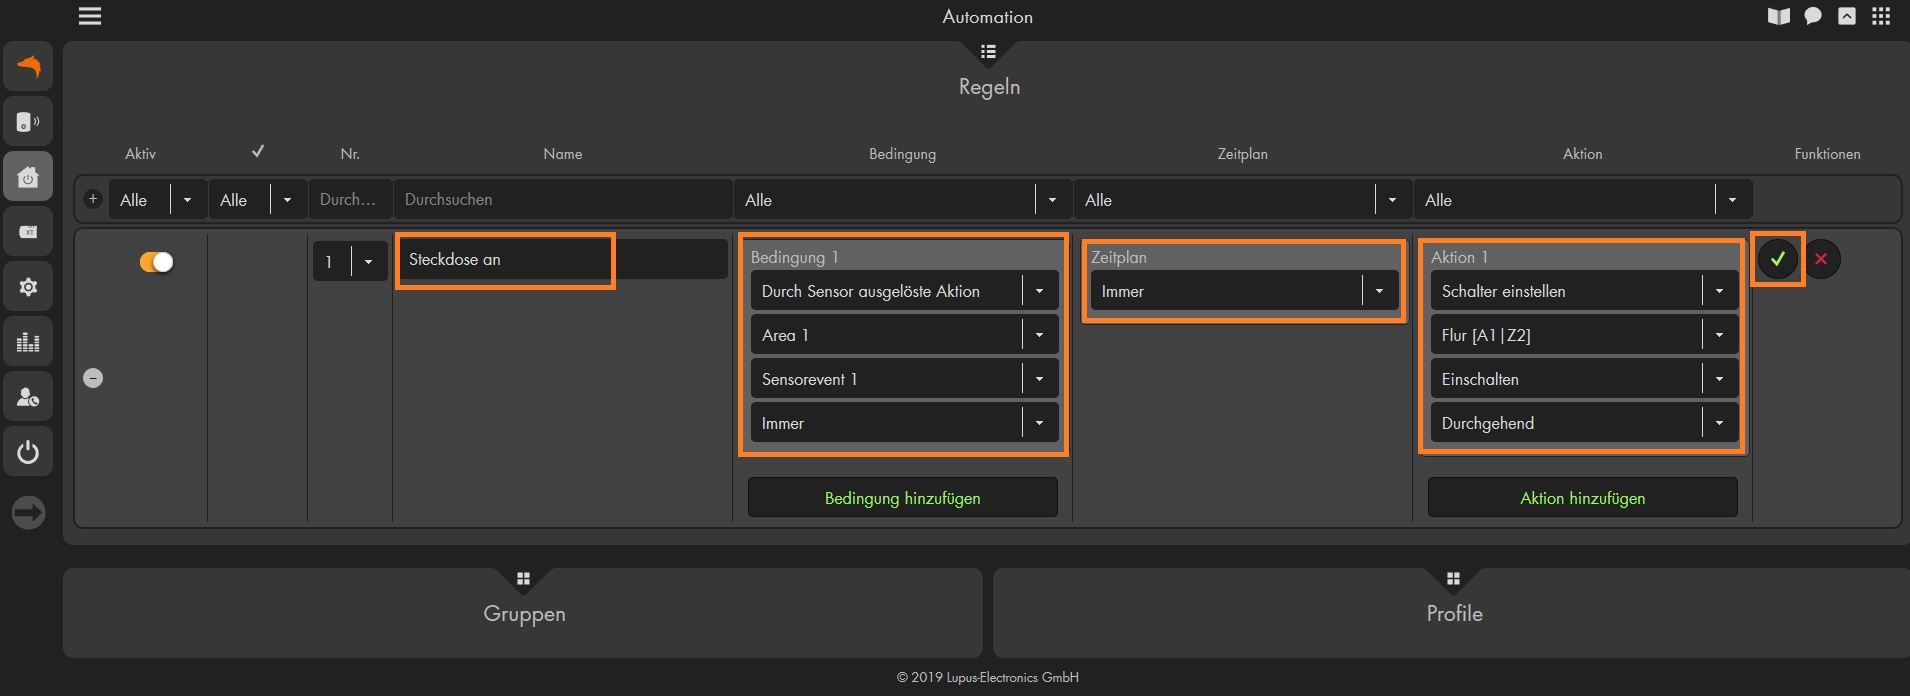
- You can now give the automation a name so that you can see at a glance what this automation should do.
Under “Condition” you can now enter the “sensor event” you have selected or select another condition under which your automation should be triggered.
Under “Schedule” you can specify when this automation should be executed: e.g. whenever the condition is met.
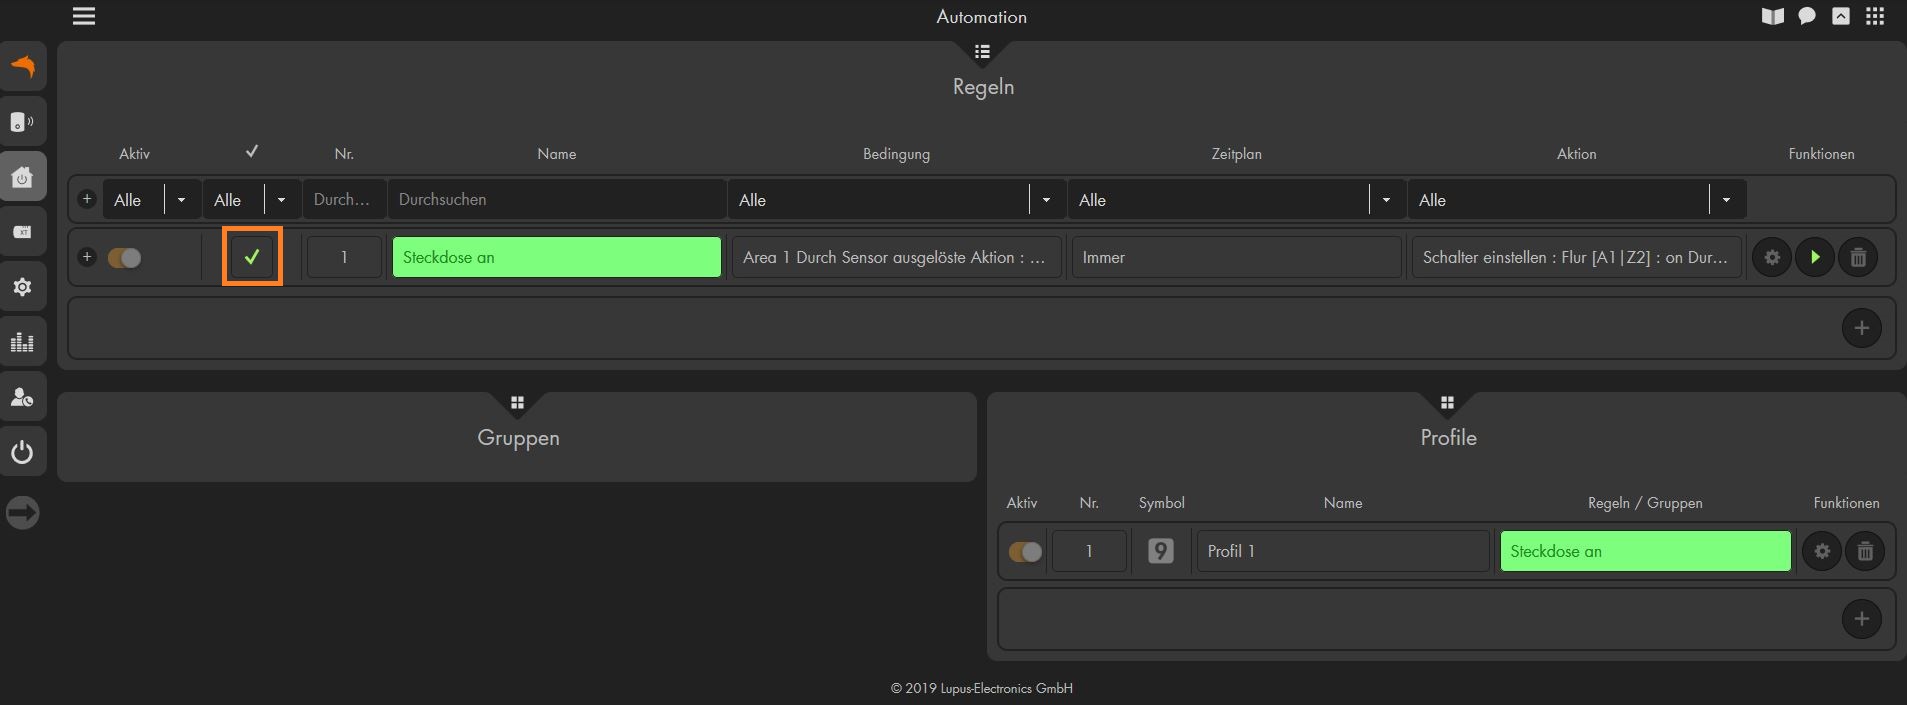
Under “Action” you now specify what should happen if the condition and the schedule are met.In the example, we let our window/door contact, which triggers sensor event 1, switch on a wireless socket every time this happens.
If you want more than one condition to be met or you want to trigger more than one action, you can link them using “Add Action”.
Click on “Done” (green check mark) to apply the automation.
- You can now give the automation a name so that you can see at a glance what this automation should do.
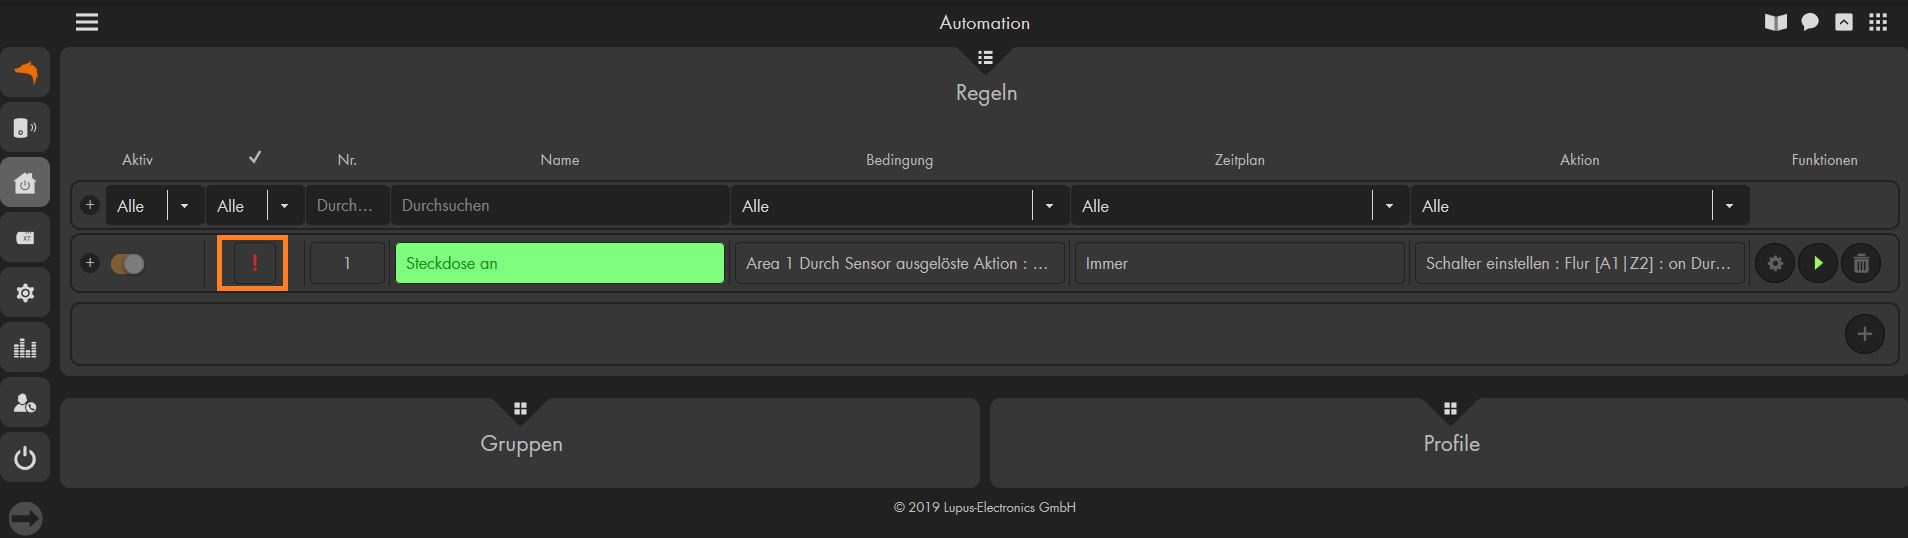
- However, your action is not yet being carried out - you can tell this by the red exclamation mark to the left of the automation number. This means that this automation is not yet assigned to the currently active profile.
- We manage profiles under the pull down / drop down menu “Profiles”.
If no profile has been created yet, click on “Add” (plus symbol).
- We manage profiles under the pull down / drop down menu “Profiles”.

- Give the profile a freely selectable name and add the rule you just created under “Rules / Groups” using “Add” and then click “Done” (green check mark).
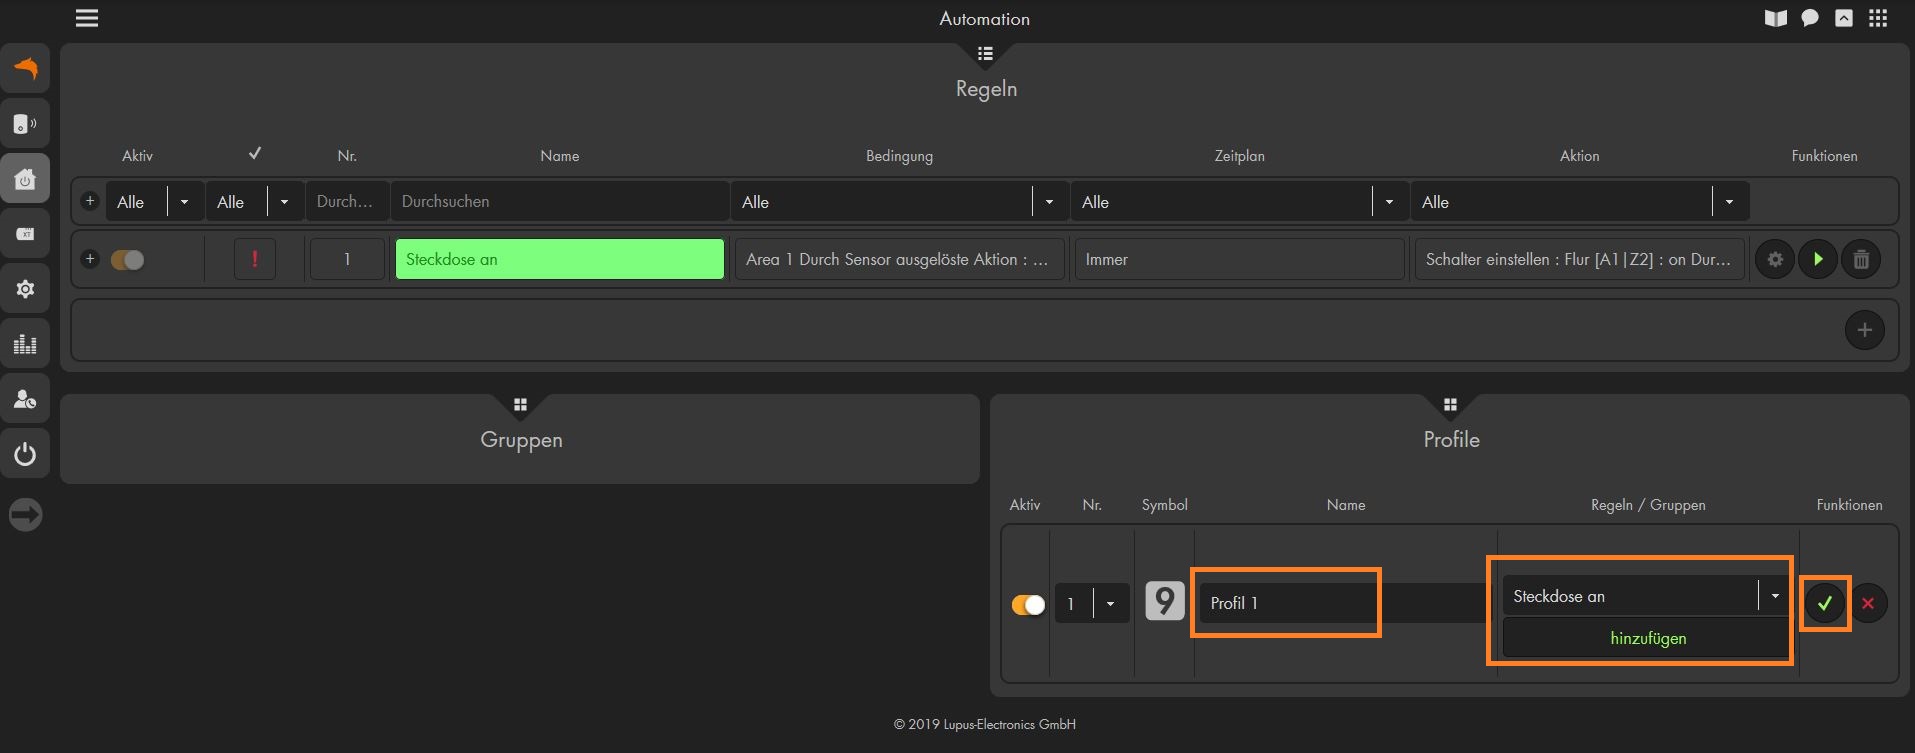
- The completed rule which is assigned to an active profile then appears as follows. In addition, a green check mark under “Rules” now indicates that this rule is active.