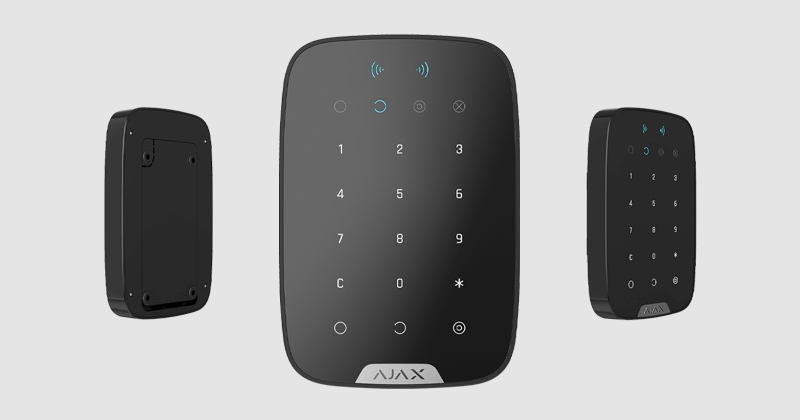
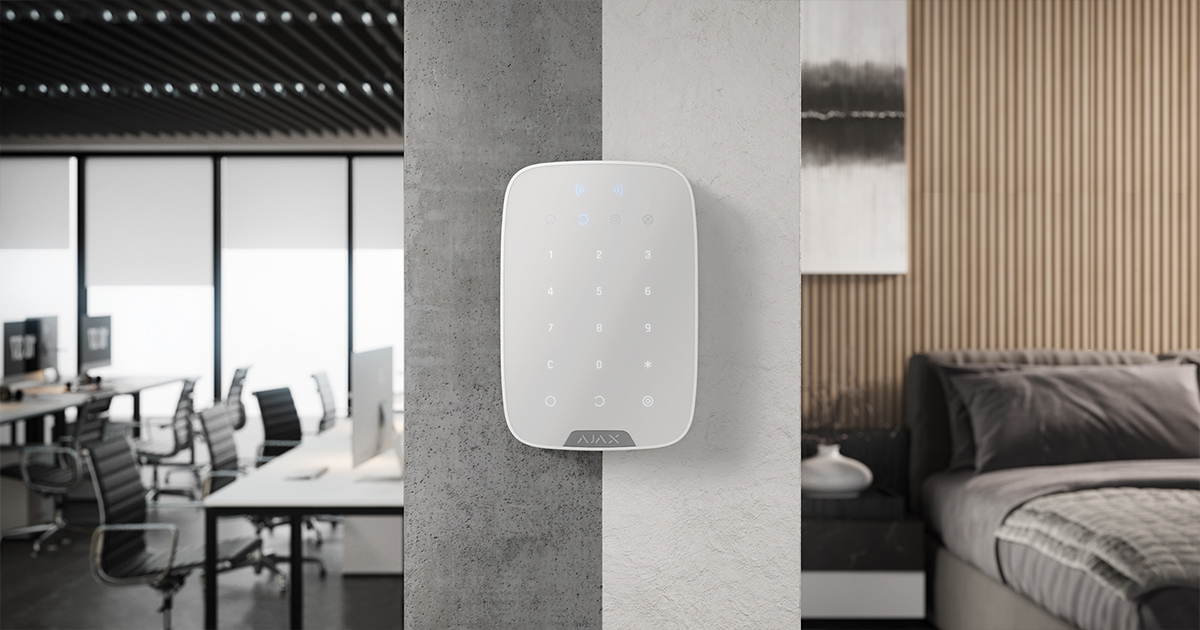
KeyPad Plus is a wireless touch keyboard for controlling the Ajax security system using protected cards and tags. The device is installed indoors and supports "silent alarm" when a duress code is entered.
The arming mode can be controlled using passcodes, RFID cards and key fobs . The indicator light shows the current arming mode.
The keyboard can only be used with Hub Plus , Hub 2 and Hub 2 Plus (OS Malevich version 2.11 and higher). It cannot be connected to the Hub and to the ocBridge Plus and uartBridge integration modules.
The keypad is part of the Ajax security system and communicates with the hub via the secure Jeweller radio protocol . The communication range to the hub is up to 1700 meters in an open area. The included batteries can keep the device running for up to 4.5 years.
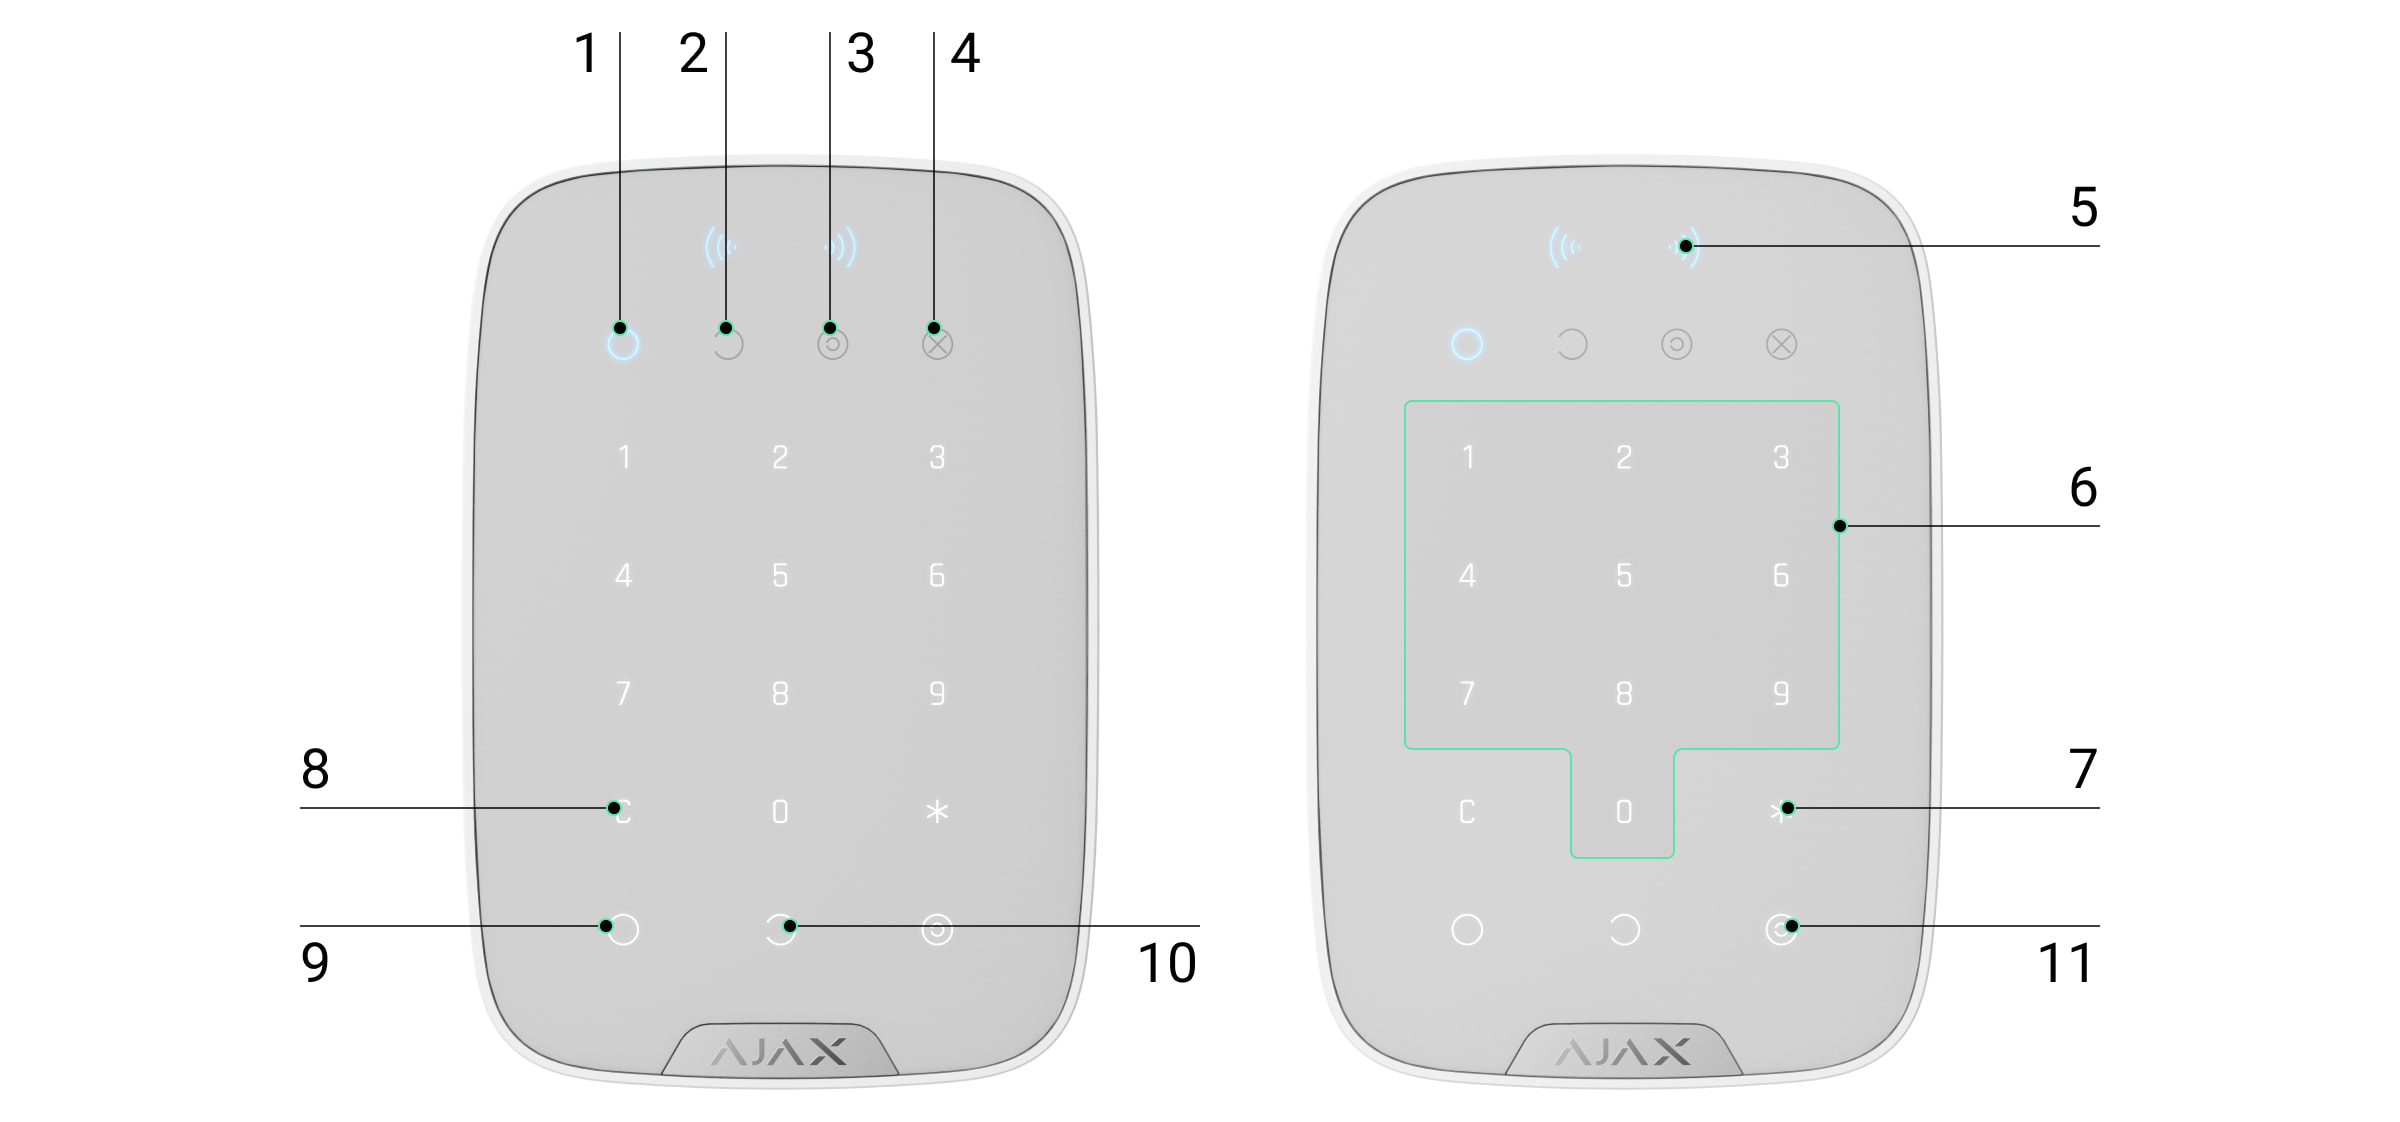
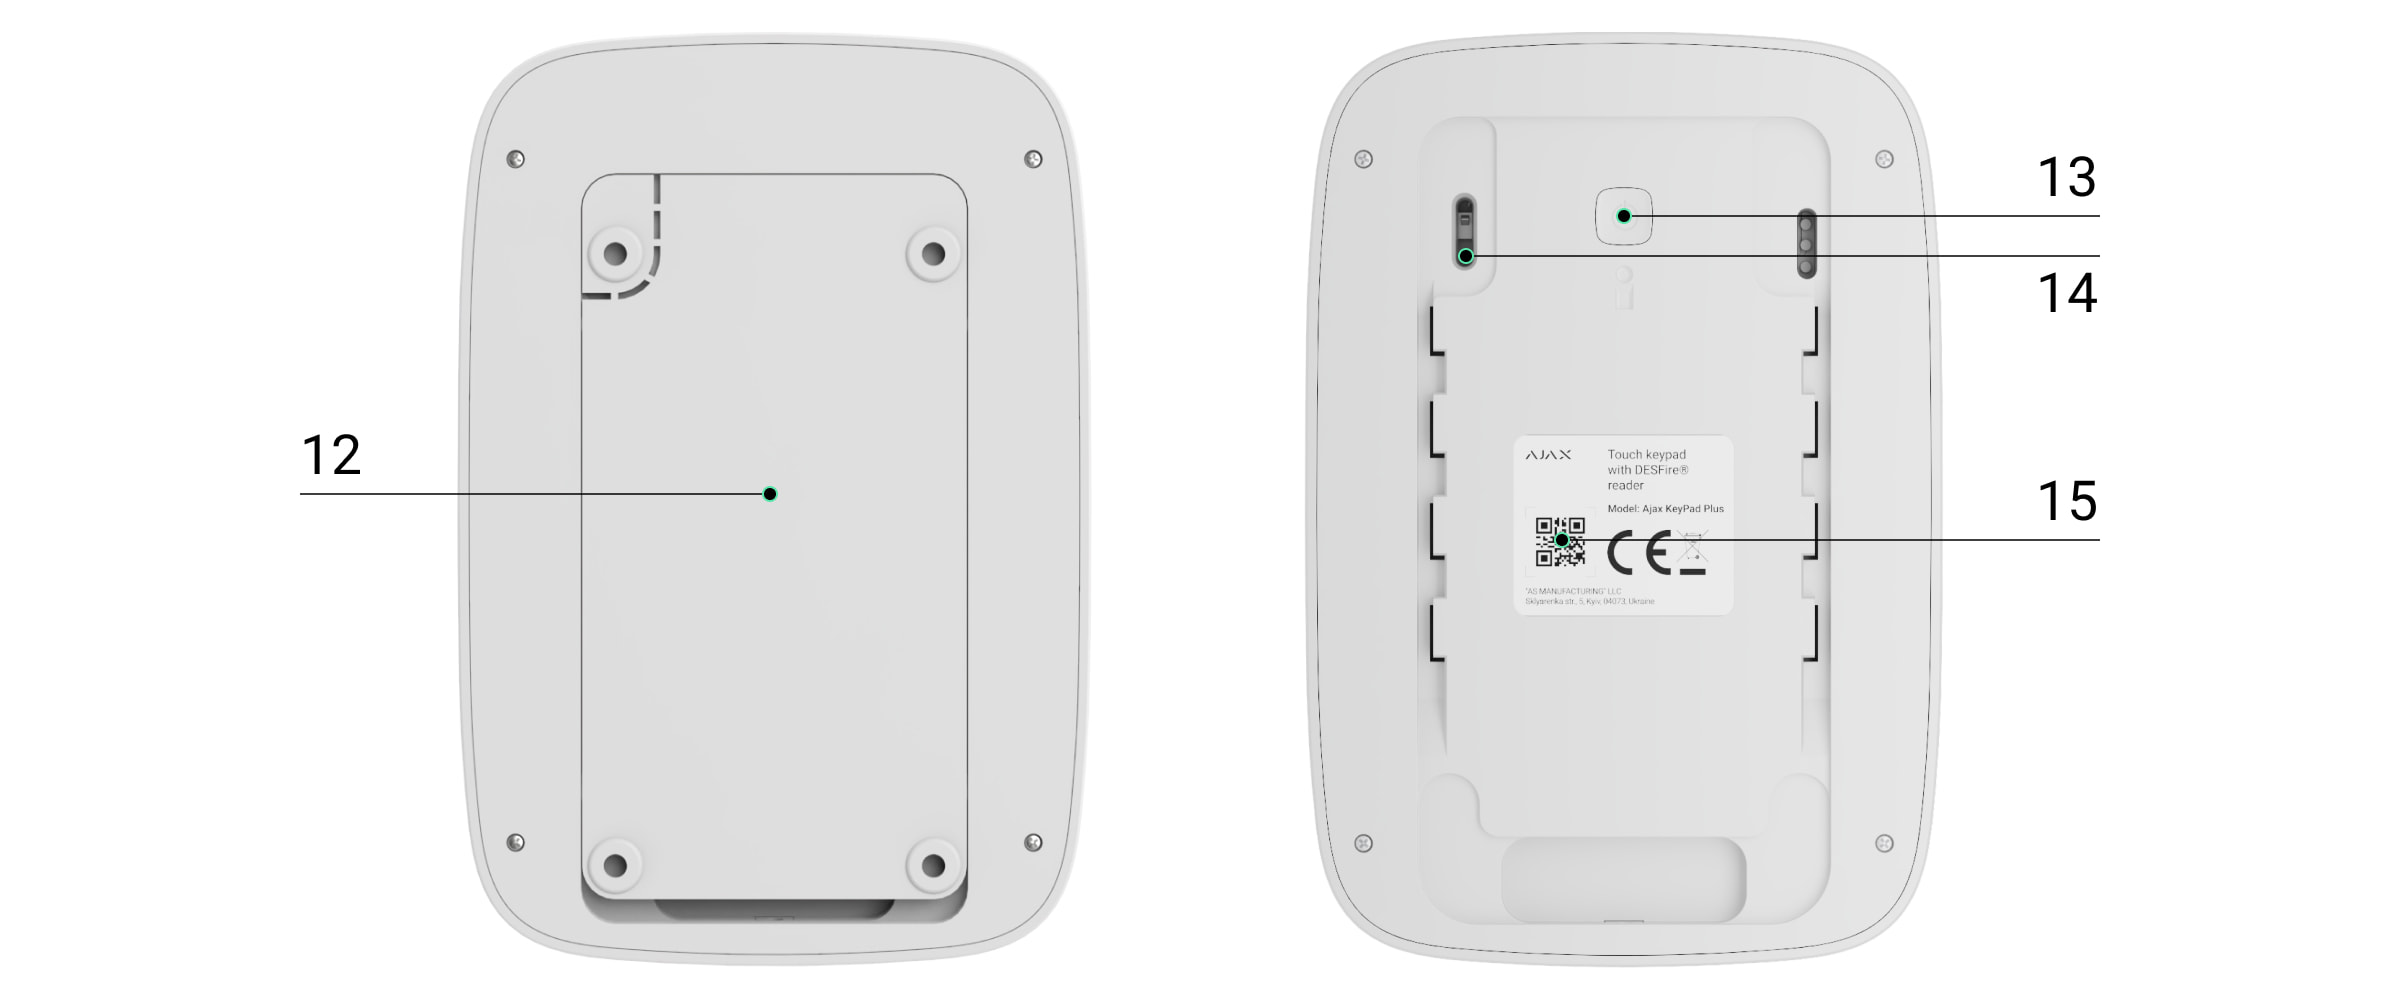
Functional elements
- LED indicator for armed
- LED indicator for disarmed
- LED display night mode
- LED display fault
- LED display for reader
- Touch control panel for codes
- Function key
- Reset button
- Arming button
- Disarm button
- Button to activate night mode
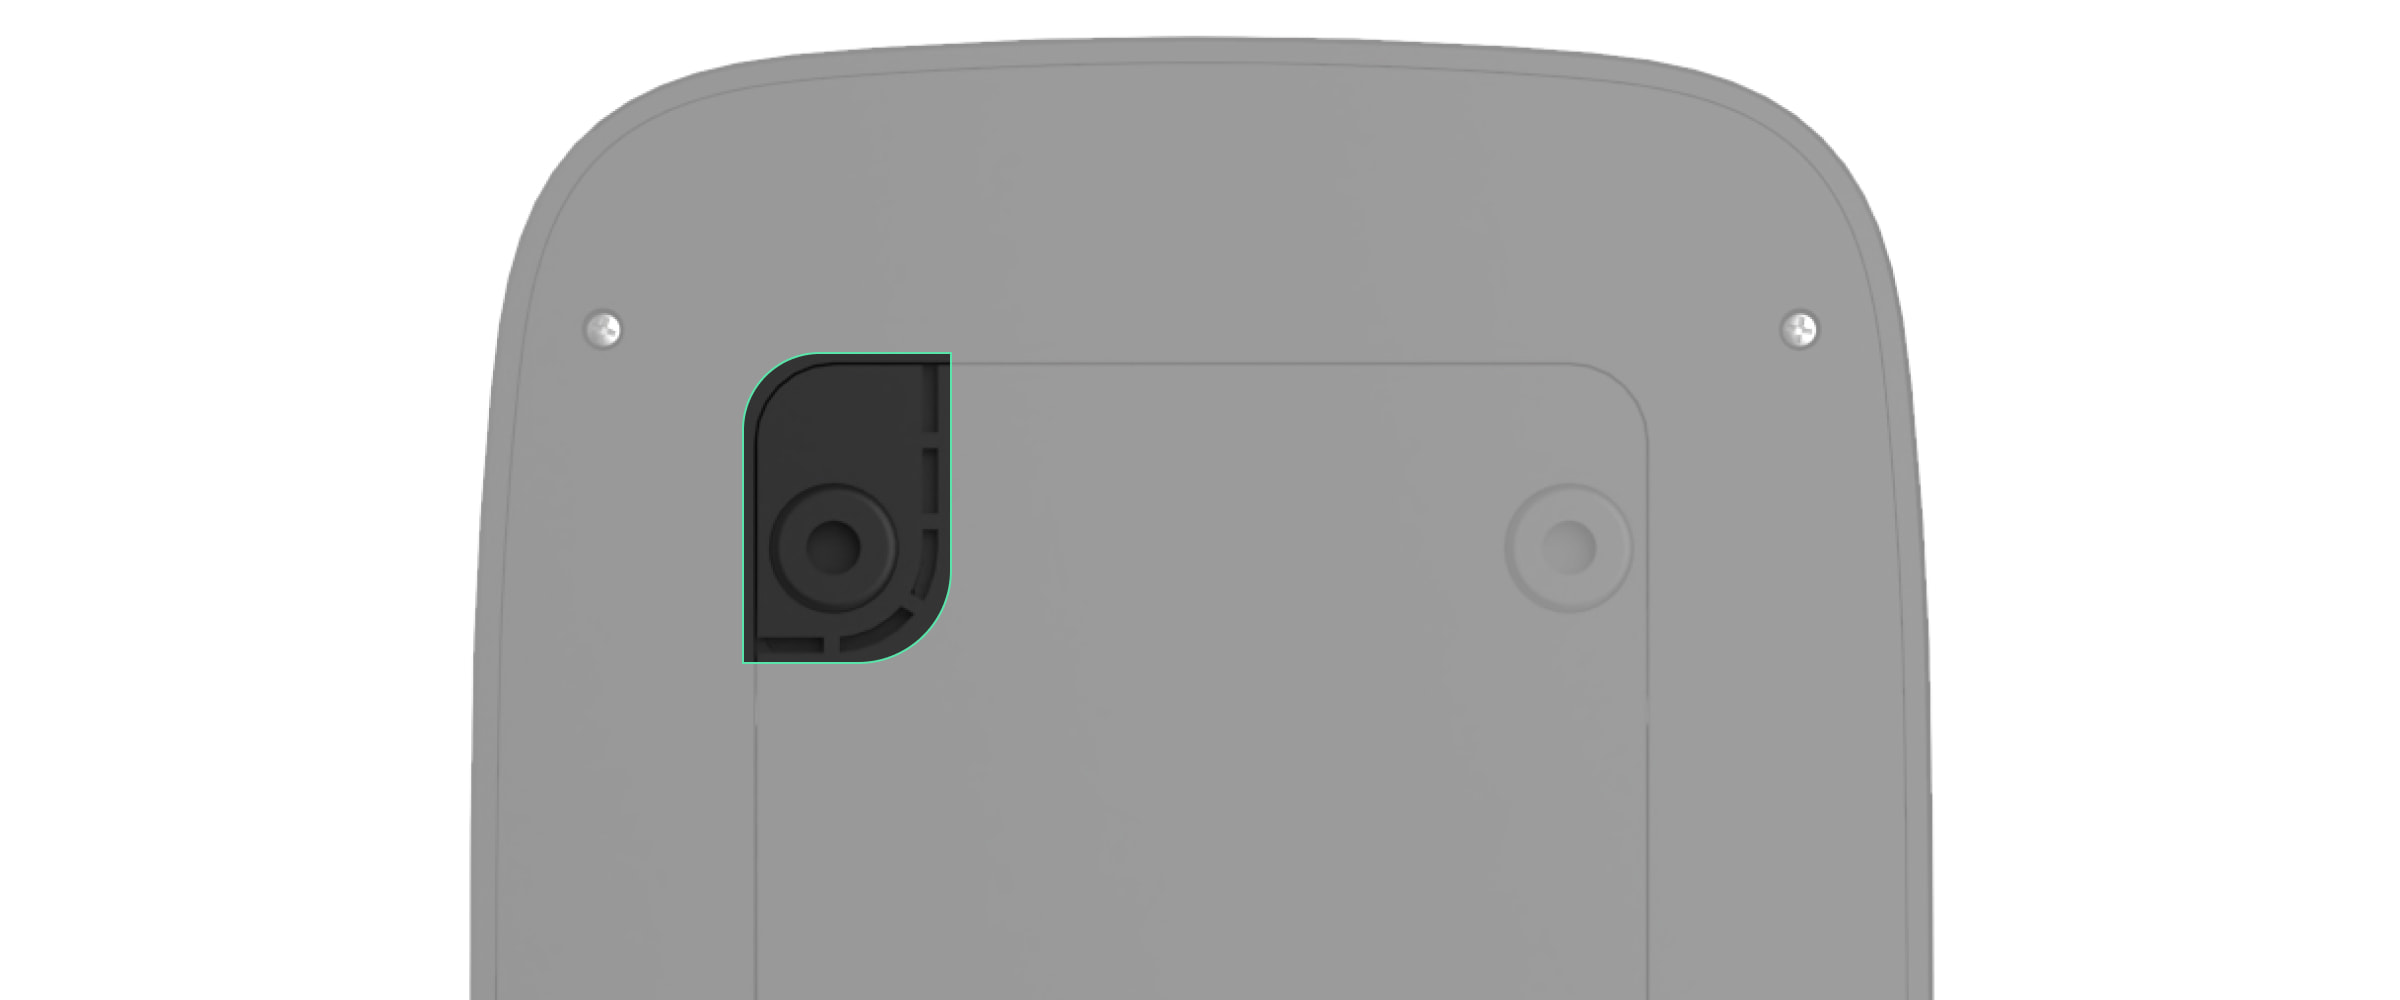
- SmartBracket mount (to remove the mount, slide it down)
Do not tear off the perforated part of the SmartBracket. This is required to operate the tamper switch.
- On/Off button
- Tamper switch
- Device QR code
functionality
Video Player
00:00
00:04
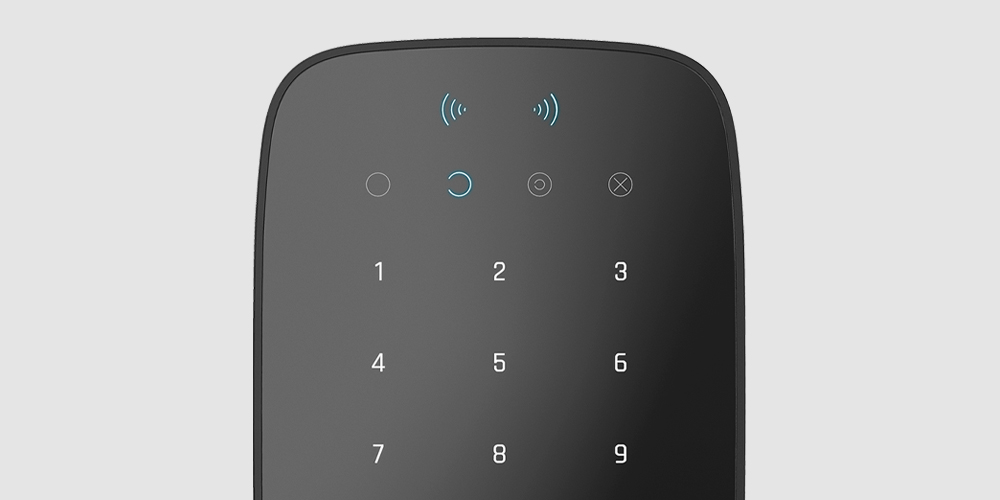
The KeyPad Plus can arm and disarm the entire property or individual groups, as well as activate night mode . You can control the arming modes with the KeyPad Plus by:
- Use codes . The keypad supports general and personal codes as well as arming without a code.
- Use cards or key fobs . Tag is a key fob and Pass is a card . For fast and secure user identification, the KeyPad Plus uses DESFire® technology. DESFire® is based on the international standard ISO 14443 and combines comprehensive 128-bit encryption and copy protection.
KeyPad Plus supports the following code types:
- Keyboard code — a general code set for the keyboard. When used, all events are delivered to Ajax apps on behalf of the keyboard.
- User code — a personal code set for users who have an account in the system. When used, all events are transmitted to Ajax applications on behalf of the user.
- Keyboard access code is set for a person who is not registered in the system. When used, events with a name associated with this code are delivered to Ajax apps.
The number of personal codes and access codes depends on the hub model.
Before entering a code or using a tag/pass, the KeyPad Plus must be activated (“woken up”) by swiping the touchpad from top to bottom. When activated, a beep sounds and the keyboard lighting turns on.
The KeyPad Plus is equipped with LED indicators that show the current arming mode and any malfunctions of the KeyPad. The arming mode is only displayed when the control panel is active (device lighting is on).
The KeyPad Plus can be used without external lighting as it has a keyboard backlight. Pressing the keys is accompanied by a sound signal. The brightness of the lighting and the volume of the sound signal can be adjusted in the settings. If you do not touch the keyboard for 4 seconds, the KeyPad Plus dims the lighting and after another 8 seconds it switches to power saving mode and turns the lighting off completely. Touching the keys is accompanied by a sound signal.
When the batteries are low, the lighting will switch to the lowest level regardless of the settings.
Function key
The KeyPad Plus keyboard has a function key that can be used in 3 different modes:
- Off — the function key is disabled and does not execute any commands when pressed.
- Alarm — the system sends an alarm to the monitoring center and to all users when the function key is pressed.
- Silence fire alarm — Pressing the Function button silences the siren of Ajax fire detectors. This option only works if the Networked fire detector alarm function is enabled (Hub → Settings
→ Service → Fire detector settings).
Threat Code
KeyPad Plus supports duress codes . They allow you to simulate disarming. The Ajax app and sirens installed at the facility will not be triggered, but the security company and system users will be notified of the incident.
Two-stage arming
The KeyPad Plus can be used for two-stage arming, but cannot be set up as a final device. The two-stage arming process with tag and pass is the same as arming with a personal or general code on the KeyPad.
Transmission of events to emergency call and service control centers (NSL)
The Ajax security system can connect to the NSL and transmit events and alarms to the control center of the security company in SurGard (Contact ID), ADEMCO 685, SIA (DC-09) and other proprietary protocols. A full list of supported protocols can be found here . The device ID and loop (zone) number can be found in Device states .
Connection
KeyPad Plus is not compatible with the Hub, third-party security panels, and the ocBridge Plus and uartBridge integration modules.
Before you start connecting
- Install the Ajax app and create an account . Add a hub to the app and create at least one room.
- Make sure that the hub is turned on and has access to the Internet (via Ethernet, WiFi and/or cellular network). You can see this both in the Ajax app and on the hub itself. When the hub is connected to the network, it will glow white or green.
- The hub must be disarmed and not in the update process.
Only a user with administrator rights or PRO can add a device to the hub.
How to connect the KeyPad Plus
- Open the Ajax app. If your account has access to multiple hubs, select the hub you want to connect the KeyPad Plus to.
- Go to the Devices tab
and click Add Device .
- Name the keypad, scan or type the QR code (found on the packaging and under the SmartBracket) and add the keypad to your desired room.
- Press OK . The countdown begins.
- Turn the device on by pressing and holding the power button for 3 seconds. Once the KeyPad Plus is connected, it will appear in the hub's list of devices in the app. To connect, the keypad must be within wireless range of the hub. If the connection was unsuccessful, try again after 10 seconds.
The KeyPad Plus can only be connected to one hub. If it is connected to a new hub, no more commands will be sent to the old hub. However, the KeyPad Plus will not be removed from the list of "devices" of the old hub. This must be done manually in the Ajax app.
If the KeyPad Plus fails to connect to the hub, it will automatically turn off after 6 seconds. You do not need to turn off the device before attempting to connect again.
The update of the device status in the device list depends on the Jeweller settings, the default value is 36 seconds.
Symbols
Icons indicate some operating states of the KeyPad Plus. You can find them in the Ajax app when you click on Devices tap.
| symbol | Meaning |
| Jeweller Signal Strength — Displays the signal strength between the hub (or wireless repeater) and the KeyPad Plus. | |
| Battery level of the KeyPad Plus. | |
| KeyPad Plus is connected via a signal-amplifying radio repeater . | |
| KeyPad Plus case health notifications are temporarily disabled. Learn more | |
| KeyPad Plus is temporarily completely disabled. Learn more | |
| Card/fob reader is turned on in KeyPad Plus settings. | |
| Card/fob reader is turned off in KeyPad Plus settings. |
KeyPad Plus states
The status contains information about the device and its operating parameters. You can view the status of your KeyPad Plus in the Ajax app:
- Go to the Devices tab
.
- Select the KeyPad Plus from the list.
| parameter | Meaning |
| Disturbance | If you on |
| temperature | Temperature of the keyboard. Measured on the processor and changes slowly. The permissible deviation between the value in the app and the room temperature is 2°C. The value is updated as soon as the detector detects a temperature change of at least 2°C. You can set up a temperature scenario to control automation devices Learn more |
| Jeweller signal strength | Jeweller signal strength between the hub (or the signal-amplifying radio repeater) and the keypad. Recommended value is 2-3 bars. |
| Connection via Jeweller | Connection status between the hub or the Rex wireless repeater and the keypad: Online — the keypad is connected. Offline — no connection to the keypad. |
| Battery charge | Battery charge level. There are two states: OK Low battery When the battery is low, the system users and the security company are notified. After receiving a low battery notification, the keyboard can continue to operate for up to 2 months. How the battery level is displayed in Ajax apps |
| Housing cover | Tamper protection of the device that reacts to tearing off or tampering with the housing: Open Closed What is a tamper switch |
| Works via *Name of wireless repeater* | Indicates whether the device is connected via a ReX wireless repeater. This field is not displayed if the keyboard is connected directly to the hub. |
| Card/Tag Reader | Indicates whether the reader is enabled for use with cards and tags. |
| Easy change of arming modes/Easy change of group arming modes | Indicates whether the feature to easily change arming modes with Pass and Tag is enabled, i.e. whether pressing the arm button is required or not. |
| Temporary deactivation | Indicates the operating status of the keypad: No — the device is operating in normal mode and transmitting all events. Housing only — the hub administrator has disabled notifications from the tamper switch. Complete — the hub administrator has completely disabled the keypad from system operation. The device does not execute system commands and does not report alarms or other events. Learn more |
| Firmware | Firmware version of the KeyPad Plus. |
| Device ID | ID number of the device. |
| Device № | Zone number of the device. |
Settings
The KeyPad Plus is configured in the Ajax app:
- Go to the Devices tab
.
- Select the KeyPad Plus from the list.
- Go to Settings by clicking on the gear icon
click.
To apply the changes to the settings, you must tap Back .
| parameter | Meaning |
| Surname | Device name. Appears in the device list, SMS notifications, and event list. To change the device name, click the text box. The name can be up to 12 characters in the Cyrillic alphabet or up to 24 characters in the Latin alphabet. |
| Space | Displays the virtual room to which the KeyPad Plus is assigned. The name of the room is displayed in SMS notifications and in the event list. |
| Group management | Select the group that can be armed and disarmed by the device. You can select either all groups or just a specific one. This field is only displayed if group mode is enabled. |
| Access options | Select the arming/disarming method: Keypad codes only User codes only Keypad or user codes |
| Keyboard code | Sets a general code for the security check. This can be between 4 and 6 digits long. |
| Threat Code | Sets a general duress code for the silent alarm. This can be between 4 and 6 digits long. Learn more |
| Function key | Sets the function of the * ( Function key ) button: Off — the function key is disabled and does not execute any commands when pressed. Alarm — the system sends an alarm to the monitoring station and all users when the function key is pressed. Silence fire alarm — pressing the Function button silences the siren of Ajax fire detectors. The option only works if the alarm of networked fire detectors is enabled. Learn more |
| Arming without code | This option allows you to arm the system without entering a code. Simply press the Arm button or the Night Mode button. |
| Blocking in case of unauthorized access | If the option is active, the keypad will be locked for a preset period of time if an invalid code is entered or a transponder without access is used more than 3 times within 1 minute. During this period, it will not be possible to disarm the system using the keypad. You can unlock the keypad using the Ajax app. |
| Lock time (min.) | Sets the period of time during which the keyboard is locked: 3 minutes 5 minutes 10 minutes 20 minutes 30 minutes 60 minutes 90 minutes 180 minutes |
| brightness | Sets the brightness of the keypad's front panel backlight. The backlight is only on when the keypad is activated (awake). This option does not affect the brightness level of the card/fob reader indicators and arming modes. |
| Volume when activated | Sets the volume of the sound that accompanies key presses. |
| Card/Tag Reader | When enabled, arming modes can be controlled by pass and tag transponders. |
| Easy change of arming modes/ Easily change group arming modes | When enabled, simply hold the tag or pass in front of the reader to change the arming mode. It is not necessary to press the Arm , Disarm or Night Mode button. The arming state will be reversed automatically. This option is available when the card/fob reader is enabled in the keypad settings. When Group Mode is enabled, this option is available when a specific group is selected in the Group Management field in the keypad settings. Learn more |
| Alarm by siren when the panic button is pressed | This field is only displayed if the Alarm option is selected for the function key . When this option is enabled, all sirens connected to the security system will trigger an alarm when the function key is pressed. |
| Jeweller signal strength test | Starts the Jeweller signal strength test. Learn more |
| Signal attenuation test | Starts the keyboard signal attenuation test. Learn more |
| Reset card/tag | Allows you to delete all Hubs bound to a tag or pass. Learn more |
| Temporary deactivation | Allows you to disable the device without removing it from the system. Two options are available: Completely — the device does not follow system commands and does not participate in automation scenarios. The system ignores alarms and other device events. Chassis only — the system ignores only the device's tamper alarm. Learn more about temporarily disabling devices |
| User Guide | Opens the KeyPad Plus user manual in the Ajax app. |
| Unpair device | Disconnects the KeyPad Plus from the hub. All KeyPad Plus settings are deleted. |
The entry and exit delays are set in the settings of the respective detectors, not in the keypad settings.
Learn more about entry and exit delay
Configuring the codes
The Ajax security system allows you to set up a keyboard code, as well as personal codes for users with an account in the system.
With the OS Malevich 2.13.1 update, we also implemented the ability to create an access code for users who do not have an account in Ajax Security System. This is convenient, for example, to provide a cleaning service with access to security management. Below you will find information on how to set and use each type of code.
How to set a keyboard code
- Go to the keyboard settings.
- Click Keyboard Code .
- Set up the desired keyboard code.
How to set a keyboard threat code
- Go to the keyboard settings.
- Click Threat Code .
- Set up the desired keyboard duress code.
How to set a personal code in the Ajax app
- Go to your user profile settings ( Hub → Settings
→ Users → User Settings ).
- Click on Access Code Settings (in this menu you can also see the User ID).
- Set up user code and user threat code .
Each user sets his or her own personal code. The administrator cannot assign personal codes to users.
How to set an access code for a person not registered in the system
- Go to Hub Settings ( Hub → Settings
).
- Click Keyboard Access Codes .
- Set up name and access code .
To set a duress code, change settings for access to groups, night mode or code ID, temporarily disable the code or delete it, select the desired code from the list and make changes.
PRO user or a user with administrator rights can set an access code or change its settings. This function is supported by Hub control panels with OS Malevich 2.13.1 and newer. Hub model does not support access codes.
Adding transponders
The KeyPad Plus can work with our tag key fobs and pass cards as well as third-party transponders that use DESFire® technology.
Before adding third-party devices that support DESFire®, please make sure they have enough free space to support the new keypad. The third-party device should ideally already be pre-formatted.
The maximum number of connected transponders depends on the hub model. The added transponders do not affect the hub's total device limit.
| Hub model | Number of day and pass |
| Hub Plus | 99 |
| Hub 2 | 50 |
| Hub 2 Plus | 200 |
Adding third party tags, passes and transponders works the same way. Instructions can be found here .
Controlling security via codes
You can manage the security of an entire facility or individual groups and the night mode with general or personal codes as well as with access codes (configured by PRO user or a user with administrator rights). The KeyPad Plus allows the use of codes with a length of 4 to 6 digits. Incorrectly entered digits can be deleted with the button delete.
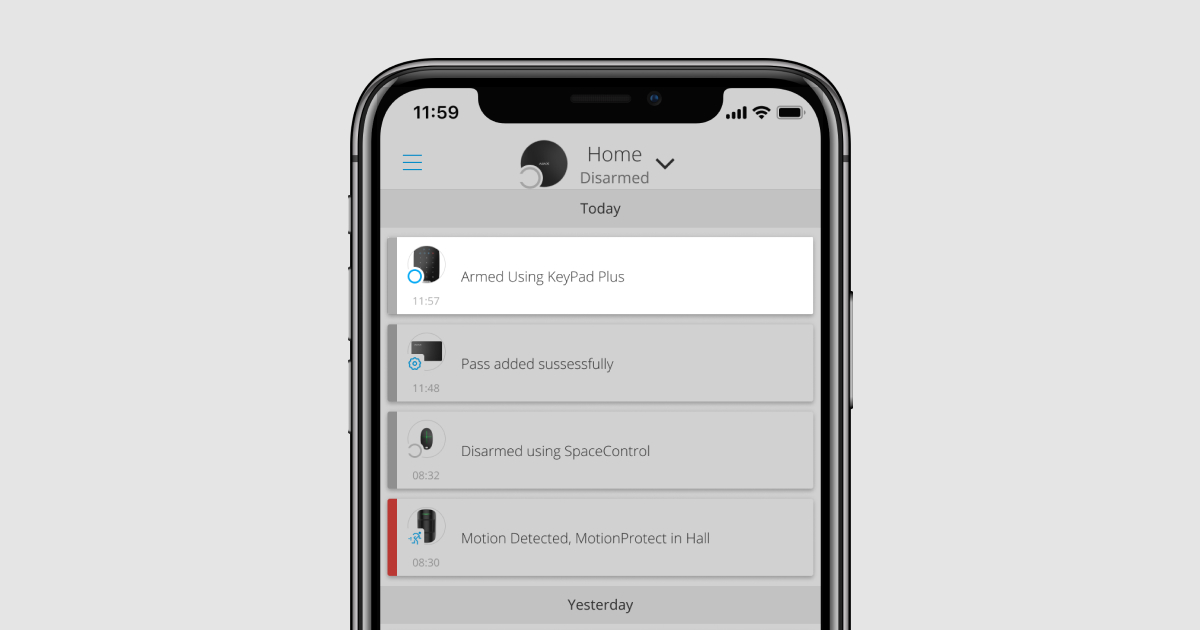
If a personal code or access code is used, the name of the user who disarmed or armed the system will be displayed in the hub events and notifications. If a general code is used, the name of the user who changed the arming mode will not be displayed.
Keypad access codes are supported by Hub control panels with OS Malevich 2.13.1 and newer. The Hub model does not support this feature.
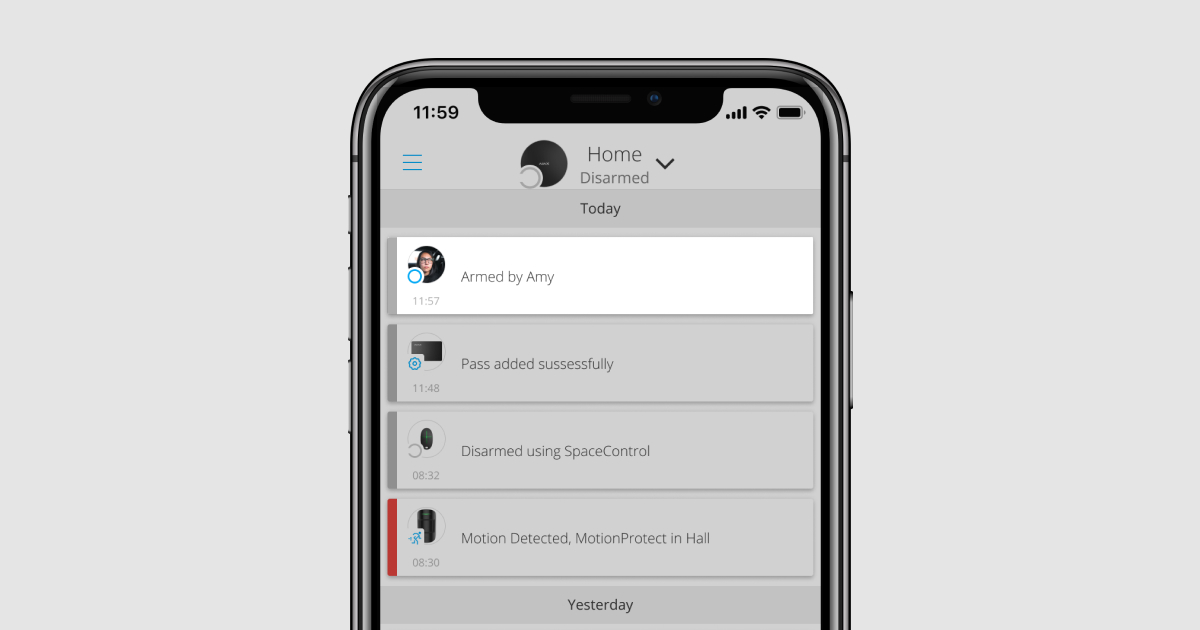
| Arming with a personal code The user name is displayed in the notifications and event history |
| Arming with a general code The device name is displayed in the notifications and event history |
The KeyPad Plus will be locked for a set period of time if an incorrect code is entered three times within one minute. The corresponding notifications will be sent to the users and the security company. The keypad can be unlocked by an administrator or PRO in the Ajax app.
Controlling the security of an entire object with a common code
- Activate the keypad by swiping your hand over it.
- Enter the general code .
- Press the arming button
/ Disarm button
/ Night mode button
.
For example: 1234 →
Security management of groups with a common code
- Activate the keypad by swiping your hand over it.
- Enter the general code .
- Press * (function key).
- Enter the group ID .
- Press the arming button
/ Disarm button
/ Night mode button
.
For example: 1234 → * → 2 →
If a group has been assigned to the KeyPad Plus (in the Group Management field in the keypad settings), you do not need to enter the group ID. To manage the security of this group, simply enter a general or personal code.
Please note that if the KeyPad Plus is assigned to a group, you cannot activate Night Mode with a general code. In this case, you can only activate Night Mode with a personal code (provided the user has the appropriate rights).
User rights in the Ajax security system
Control the security of an entire property with a personal code
- Activate the keypad by swiping your hand over it.
- Enter the user ID .
- Press * (function key).
- Enter your personal code .
- Press the arming button
/ Disarm button
/ Night mode button
.
For example: 2 → * → 1234 →
Security management of groups with a personal code
- Activate the keypad by swiping your hand over it.
- Enter the user ID .
- Press * (function key).
- Enter your personal code .
- Press * (function key).
- Enter the group ID .
- Press the arming button
/ Disarm button
/ Night mode button
.
For example: 2 → * → 1234 → * → 5 →
If a group has been assigned to the KeyPad Plus (in the Group Management field in the keypad settings), you do not need to enter the group ID. To manage the security of this group, simply enter a personal code.
Control the security of an entire property with one access code
Enter the access code and press the arming button / Disarm button
/ Night mode button
.
For example: 1234 →
Security management of individual groups with an access code
Enter the access code , press *, enter the group ID and press the arming button / Disarm button
/ Night mode button
.
For example: 1234 → * → 2 →
Using a threat code
A duress code allows you to simulate the system disarming. The Ajax app and the sirens installed at the facility will not be triggered, but the security company and system users will be informed. You can use both a personal and a general duress code. In keypad access codes, you can also set up a duress code for people who are not registered in the system.
Scenarios and sirens react to disarming with a duress code in the same way as they do to normal disarming.
How to use a generic threat code
- Activate the keypad by swiping your hand over it.
- Enter the global threat code .
- Press the disarm button
.
For example: 4321 →
How to use a personal threat code of a person registered in the system
- Activate the keypad by swiping your hand over it.
- Enter the user ID .
- Press * (function key).
- Enter the personal threat code .
- Press the disarm button
.
For example: 2 → * → 4422 →
How to use a threat code of a person not registered in the system
Enter the Duress Code set in Keypad Access Codes and press the Disarm button .
For example: 4567 →
Security management with tag and pass
- Activate the keypad by sliding your hand over it. The KeyPad Plus will emit a sound signal (if enabled in the settings) and the lighting will turn on.
- Hold the fob or card in front of the keypad reader. This is indicated by wave symbols on the control panel.
- Press the Arm , Disarm or Night Mode button.
Note that if Easy Arming Mode Change is enabled in the KeyPad Plus settings, there is no need to press the Arm , Disarm or Night Mode button. The Arming Mode is automatically reversed when a Tag or Pass is used.
Function for muting the alarm of networked fire detectors
The alarm of networked fire alarms can be silenced from the KeyPad Plus by pressing the function key (if the corresponding setting is enabled). The system's reaction to pressing the function key depends on the selected settings and the alarm propagation status:
- The "Networked fire alarm" function is activated and the alarm has already spread . The first time the function key is pressed, the alarm of all fire detectors that were activated exclusively via alarm propagation is muted. The second time the fire detectors that have detected a threat are also muted.
- The "Networked fire alarm" function is activated and the alarm has not yet spread . Pressing the "Function" button will mute the siren of the Ajax fire detectors.
Please note that the function is only possible if the networked fire alarm is activated in the hub settings.
With the OS Malevich 2.12 update, users can silence fire alarms in their groups without affecting detectors in groups to which they do not have access.
LED display
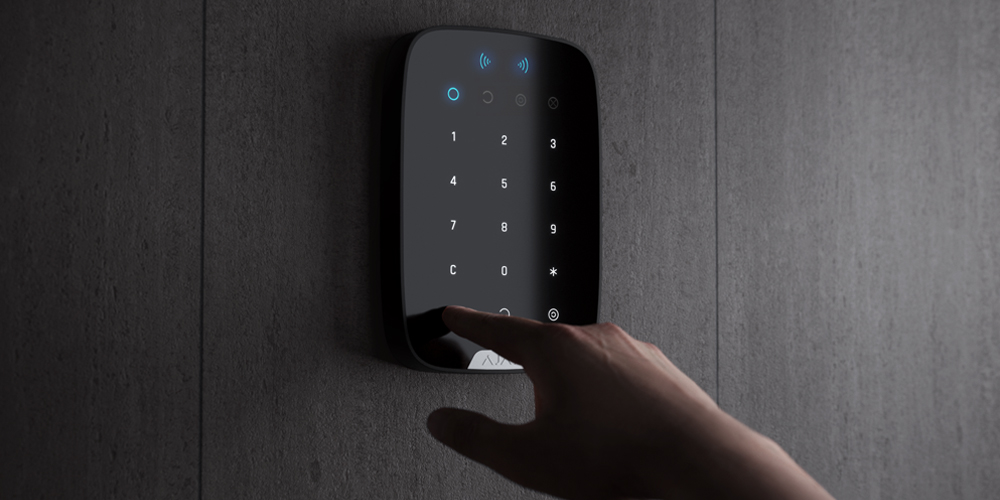
The KeyPad Plus can indicate the current arming mode, key presses, errors and its status through LED indication and sound signal. The current arming mode is indicated by the illumination when the keypad is activated. The information about the current arming mode is correctly displayed even if the arming mode was changed by another device: by a keyfob, another keypad or via the app.
You can activate the keypad by sliding your hand from top to bottom across the control panel. When activated, the keypad will turn on the light and emit a sound signal (if enabled).
| Event | LED display |
| No connection to the hub or to the signal-amplifying radio repeater | LED X flashes |
| The KeyPad Plus housing is opened (SmartBracket has been removed) | LED X flashes once briefly |
| A key was pressed | A short tone will sound and the indicator of the current arming status mode of the system will flash once. The volume of the tone will depend on the keypad settings |
| The system is armed | A short tone will be emitted and the arming or night mode LED indicator will light up |
| The system is disarmed | Two short beeps are emitted and the disarm LED indicator lights up |
| An incorrect code was entered or an attempt was made to change the arming mode with an invalid or deactivated transponder | A long tone is emitted and the LED lighting of the control panel flashes 3 times |
| The system cannot be armed (e.g. the system integrity check is activated and a window is open) | A long tone is emitted and the LED indicator of the current arming mode flashes 3 times |
| The hub does not execute any commands because there is no connection | A long tone is emitted and the LED X ( error ) lights up |
| The keypad is locked because an attempt was made to guess the code or change the arming mode with an invalid transponder | A long tone will be emitted and the LED indicators for the arming status and the keypad illumination will flash 3 times |
| The batteries are empty | After changing the arming mode, the X indicator lights up. The touch keys are locked during this time. If you try to turn on the keypad with empty batteries, a long beep will be emitted, the X indicator will slowly turn on and off and finally the keypad will turn off . How do I replace the batteries in the KeyPad Plus? |
Performance test
The Ajax security system offers different types of tests to place the devices in the right places.
The KeyPad Plus does not start the test immediately, but only after a polling interval between the hub and the device (36 seconds with default settings). You can change the polling interval in the Jeweller menu in the hub settings.
Tests can be found in the device settings (Ajax app → Devices → KeyPad Plus → Settings
):
Selecting the installation location
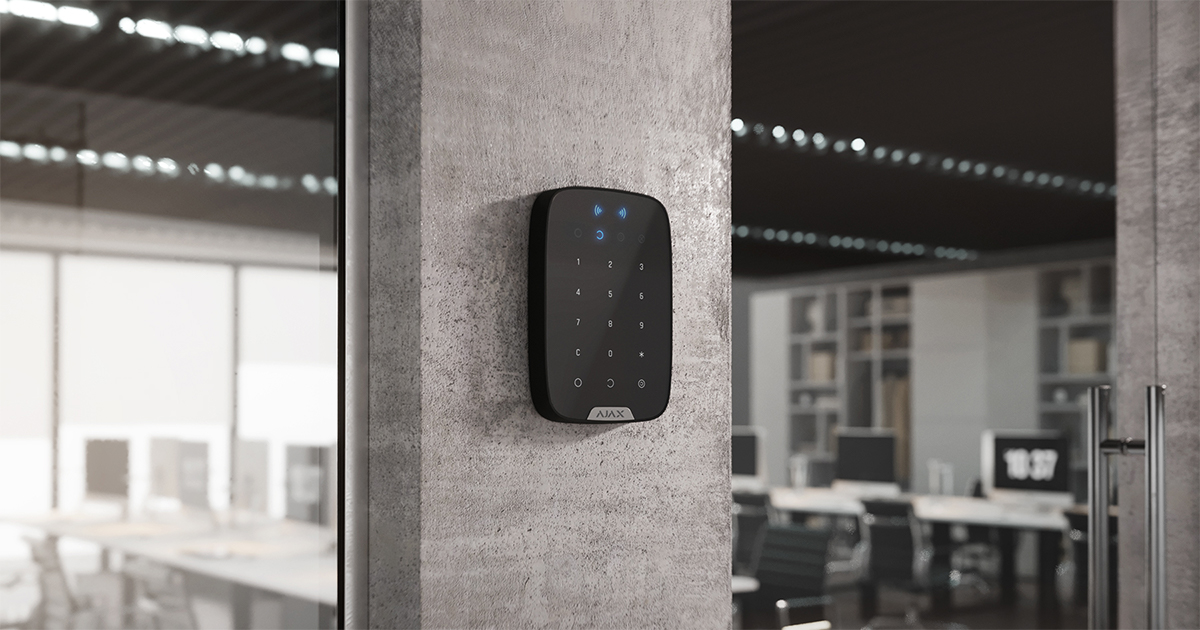
The KeyPad Plus is best placed indoors near the entrance. This allows you to disarm the security system before the entry delay expires and quickly re-arm it when you leave the room.
If you hold the KeyPad Plus in your hand or place it on a table, we cannot guarantee that the sensor keys will function properly.
It is recommended to mount the keypad at a height of 1.3-1.5 m above the floor. Mount the keypad on a flat, vertical surface. This will allow the KeyPad Plus to be securely attached to the surface and will prevent false alarms from the tamper switch.
In addition, the installation location of the KeyPad is determined by the distance to the hub or radio repeater, and the presence of obstacles to radio transmission between the devices: walls, ceilings or other objects.
What influences the radio range
Be sure to check the signal strength of the Jeweller at the desired installation location. If the signal strength is only one bar, we cannot guarantee stable operation of the security system. To achieve a better signal strength, move the device: even moving it 20 centimeters can significantly improve the signal strength.
If the device has a weak or unstable signal strength at the other location, use a signal-boosting wireless repeater .
Do not install the keypad:
- In locations where the keyboard may be interfered with by clothing (e.g. near a coat rack), power cords, or Ethernet cables. This may result in false keyboard activations.
- In rooms with temperatures or humidity outside the permissible limits. This may damage the device.
- In locations with insufficient or unstable signal strength between the KeyPad Plus and the hub or signal-amplifying radio repeater.
- Within 1 meter of a hub or signal-boosting radio repeater.
- Near electrical lines. This may cause interference with communication.
- Outdoors. This can damage the device.
Installing the keypad
Before installing the KeyPad Plus, make sure that you have chosen the optimal location and that it meets the requirements of this manual.
- Attach the keyboard to the surface with double-sided tape and perform the Jeweller signal strength and attenuation test. If the signal strength is unstable or low, move the device or use a signal-boosting wireless repeater .
Double-sided tape is used only to temporarily attach the keyboard. A glued device can detach from the surface at any time and fall off, which may cause malfunction. Please note that with a glued device, the tamper switch will not be triggered when attempting to tear the device off.
- Check that you can comfortably enter codes and use the tag or pass to control the arming modes. If it is inconvenient to control the arming mode from the selected location, relocate the keypad.
- Remove the keyboard from the SmartBracket.
- Attach the SmartBracket to the wall using the screws provided. Use at least two fixing points when attaching. Make sure to fix the perforated corner of the SmartBracket so that the keyboard reacts to attempts to dismantle it.
- Slide the KeyPad Plus onto the mounting plate and tighten the screw on the bottom of the housing. This is needed to secure the keyboard more securely and prevent it from being quickly removed from the mount.
- When the keypad is attached to the SmartBracket, the LED X flashes to signal that the tamper switch has been triggered. If the LED has not flashed, check the tamper status in the Ajax app and the screwing of the keypad.
maintenance
Check regularly that the keyboard is working properly. For example, every one to two weeks. Clean the device of dust, cobwebs and other dirt as soon as they appear. Use a soft, dry cloth suitable for cleaning the technology.
Do not use substances such as alcohol, acetone, petrol or other active solvents to clean the KeyPad Plus. Wipe the control panel carefully: scratches can lead to reduced keyboard sensitivity.
The batteries installed in the keypad have a lifespan of up to 4.5 years with standard settings. When the battery level is low, the system sends a notification and the X ( error ) indicator lights up and goes out evenly after each successful code entry.
The KeyPad Plus can continue to operate for up to 2 months after the battery warning. However, we recommend that you replace the batteries as soon as you receive the notification. Lithium batteries are preferred. They have a higher capacity and are less sensitive to temperature.
How long do batteries in Ajax devices work and what influences their lifespan
How do I replace the batteries in the KeyPad Plus
scope of delivery
- KeyPad Plus
- SmartBracket mount
- 4 inserted lithium AA batteries (FR6)
- Mounting kit
- Quick start guide
Technical data
| compatibility | Hub Plus Hub 2 Hub 2 Plus ReX ReX2 |
| Color | Black White |
| Installation location | Indoor use only |
| Keyboard type | sensor |
| Sensor type | Capacitive |
| Contactless access | DESFire EV1, EV2 ISO14443-A (13.56MHz) |
| Protection by a tamper | Available |
| Protection against code manipulation | Available. The keyboard will be locked for the time period specified in the settings if an incorrect code is entered three times |
| Protection against the use of unauthorized transponders | Available. The keyboard will be locked for the time period specified in the settings |
| Radio communication protocol with hubs and radio repeaters | Jeweller Learn more |
| Radio frequency band | 866.0–866.5MHz 868.0–868.6MHz 868.7–869.2MHz 905.0–926.5MHz 915.85–926.5MHz 921.0–922.0MHz Depending on the sales region. |
| Modulation of the radio signal | GFSK |
| Maximum transmission power | 6.06 mW (maximum 20 mW) |
| Range of the radio signal | Up to 1700 m (in open space) Learn more |
| Power supply | 4 lithium AA batteries (FR6) Electrical voltage – 1.5 V |
| Battery life | Up to 3.5 years (if card/fob reader is activated) Up to 4.5 years (if card/fob reader is deactivated) |
| Operating temperature range | From -10 °С to +40 °С |
| Permissible humidity | Up to 75% |
| Dimensions | 165 × 113 × 20mm |
| Weight | 267g |
| lifespan | ten years |
Contact AESAG Support
More Articles
- AJAX Button - Usermanual
- AJAX CombiProtect - Usermanual
- AJAX DoubleButton - Usermanual
- AJAX DoorProtect - Usermanual
- AJAX DoorProtect PLUS - Usermanual
- AJAX DoorProtect PLUS - Change Batteries
- AJAX DualCurtain Outdoor - Usermanual
- AJAX GlasProtect - Usermanual
- AJAX Hub 2 (2G) / (4G) - Usermanual
- AJAX Hub 2 Plus - Usermanual
- AJAX HomeSiren - Usermanual
- AJAX HomeSiren - Change Batteries
- AJAX KEYPAD - Usermanual
- AJAX KEYPAD PLUS - Usermanual
- AJAX MotionCam - Usermanual
- AJAX MotionProtect Curtain - Usermanual
- AJAX MotionCam Outdoor - Usermanual
- AJAX MotionCam Outdoor PhOD - Usermanual
- AJAX ReX 2 - Usermanual
- AJAX REX - Usermanual
- AJAX SpaceControl - Usermanual
- AJAX Tag und Pass - Usermanual
- AJAX MotionProtect PLUS - Usermanual
- AJAX StreetSiren - Usermanual


